Sunday, September 20, 2015

The French have landed!

Another classic Anglo-French Napoleonic bash was on the cards, with a random terrain setup by Jim (as he didn't know the army compositions). An entirely accidental selection of some fine Tudor-style buildings and a coastline led us naturally to the only sensible scenario - Napoleon's Grande Invasion of England in 1804 has happened! The evil French are racing along the coast, with only a surprised Wellington (apparently teleported from India and and promoted on the spot) available to stop them! Can he save England from the horrors of good wine and pleasant motorway food? Victory would go to the side who could capture the enemy's village while retaining control of their own.

Throwing caution (and an all-too-acute awareness of my own tactical shortcomings) to the winds, for once I decided to play rather than umpire and built a French division to take on Ross's redcoats. We use a very simple army builder system, which produces division-strength forces, and I decided to make fully half my force veterans, with an infantry bias. However my single cavalry brigade was also good - two regiments of heavy cavalry (one of them Guard) and the regiment of Chasseurs á Cheval de la Garde. Ross on the other hand had spent points on above-average generals and large numbers of cavalry, many of them heavy regiments of dragoons.

My force lacked good generals (Ney was commanding the division with his customary élan and an AV of 3, but his brigade commanders all lacked ability) so it was clear even before I saw the battlefield that I would have to sacrifice a wide command focus and use Ney himself to push hard somewhere with my veterans in a very focused attack before the British could exploit our weaknesses.

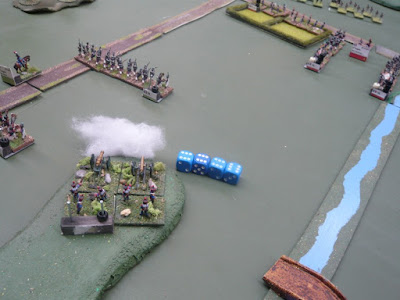
The view from the French baseline, with the coast on the left
Jim's terrain setup proved rather light on infantry-friendly terrain, and looked to favour Ross's cavalry and more flexible commanders - my troops would have to depend even more on their veteran abilities.

He had also placed a loop of river enclosing one of the inland corners, which although fordable would offer a useful defensive line if necessary.


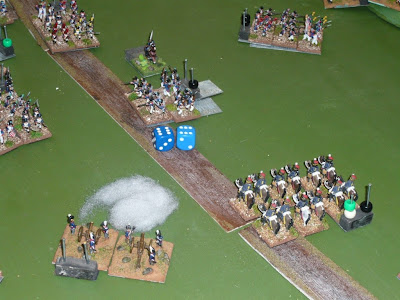
.. and from the inshore end, as the British commanders consider their options over a Nice Cup Of Tea
Jim then joined the British, while Geoff arrived to assist with the French. Both sides schemed, and drew up a hidden deployment plan.

When all was revealed Ross had concentrated his division centrally, to ensure all brigades were in command and allow a flexible response to whatever the devious Frogs came up with. Said devious Frogs, on the other hand, had accepted that our limited command and control capabilities would require effectively splitting our force in two, with the two "reserve" (i.e. crap!) infantry brigades being left to their own initiative to hold on our left, while Ney led the two veteran infantry brigades and the cavalry in a sudden coup de main through the hills on the British left.

Initially, we deployed our poorer infantry brigades well forward and a veteran brigade more ambiguously in our centre, to try and fool the enemy as to our intentions. This was aided in Turn 1 by one of the poorer brigade commanders passing his initiative roll, against all odds, and his units promptly loaded up their full 2 IPs each; seeing that, the British immediately assumed his force were all veterans!

The French recruits try to look big and brave on the left...
 However, wining the initiative roll on Turn 1 made that ruse somewhat academic, as Ney was able to immediately send the Guard cavalry galloping straight towards the open road, his cheering infantry following.

.. but on the right the Guard do what they do best,
... while the two veteran infantry brigades move forward in support.
The British deployment, before they respond to the French attack on Turn 1.

Crucially, the strong British cavalry force was deployed centrally and on their right - there was nothing immediately available to counter the rapid French mounted envelopment on the left. However, brigades were quickly on the move towards their flank to meet the threat, while the redcoats formed square and prepared to make rude gestures at La Garde.

The irresistible force prepares to meet the immovable objects...
However, by the time Wellington's mounted reinforcements were arriving in Turn 2, French infantry which had rushed up the unguarded road in the wake of the cavalry were already appearing over the crest of the hills on the British left, and a horse artillery battery had also arrived to provide close fire support. Suddenly, the squares - and even the garrison in the village - began to feel nervous...


... while in the centre, French medium guns take a deadly toll of some Scots Greys at long range
Some British cavalry made a valiant counter-attack to try and force the French off the hill, forcing infantry into square for a short time. However, this brave effort was broken by a sharp volley of canister from the French horse artillery who galloped over the crest.


While all this was going on, a major British counter-attack developed in the centre and on their right, as Ross tried to isolate a couple of French veteran infantry battalions in and around the central enclosures, as well as push towards the poorer French brigades on the French left. However, the latter had followed their orders and, after their initial demonstration of enthusiasm, had fallen back to a deep defensive position at the rear. Ross's cavalry-heavy force was able to demonstrate against them, but he simply lacked enough infantry to also mount a combined-arms assault on that flank. Under Geoff's canny command, they refused to be drawn into any reckless action and as they realised the cavalry could do little against them alone were even able to start slowly pushing forward again.

In the centre however there was a rougher tussle, with the British Light brigade skirmishing with French troops and the Guards unleashing volleys against them, but ultimately again these were just too weak to force the enemy out of those enclosures. As Cuirassiers arrived to threaten them, they had no choice but to pull back.

Unfortunately in all the excitement I managed to forget about taking photos for a large part of the game, but will hopefully be able to update this later with some of Geoff's.

Eventually, French local superiority on the British left flank (especially in troop quality) had the desired effect. The two Guard cavalry regiments must again be singled out for a Mention in Dispatches - even the Chocolate Box Carabiniers (once they finally stirred into some action) broke unit after unit of enemy horsemen. Stripped of their cavalry support, the British squares on the hills faced the lethal barrage of French canister fire alone, with the inevitable consequences.

French infantry masses for a final assault on the village...

... while in the centre, British opposition is extinguished in a hail of canister from another French battery


Although reduced to half strength, the Guard Chasseurs á Cheval continued to rampage through the British lines until Wellington's force was reduced to a stream of broken troops fleeing the field.

As ever, thanks to all the participants for a hugely enjoyable game (well, I would say that, I won!)

Postscript

Without a doubt, the French veterans won the day. Sacrificing higher command ability (and thus effectively fighting with half an army) in favour of troop quality where it mattered proved - on this occasion - to be a winning strategy. It could easily have gone very wrong though, under different circumstances.

Specifically, we were able to take advantage of our good fortune in the British deployment, as their left flank (our intended focus for attack) was left without immediate cavalry support. We were surprised (especially given the amount of cavalry they had) that the British had not defended the road on their left, as it was an obvious route for a concealed attack. Our veterans were able to exploit this with the speed of their advance, from which the British never really recovered - those extra IPs really do matter in a situation like that.

Despite having at least a 2:1 advantage in cavalry, the British seemed unable to concentrate it effectively, responding with too little mounted force to the threat on their left and enabling the better-quality French to isolate and destroy units piecemeal. Also, although the British had the same amount of artillery as the French, it was all Horse and so significantly more mobile and flexible (only one French battery was Horse). However for some reason this flexibility was never apparent and its mobility was never demonstrated - French guns always seemed to be where they were needed, and caused much more damage than their British counterparts.

All in all, a very interesting, instructive and exciting game.

Sunday, August 30, 2015

Charge!

Paul disclosed that he just happened to have significant numbers of never-before-seen French troops in the huge underground bunker which evidently stores his vast stocks of wargaming goodness. Naturally, an opportunity was immediately invented to get them onto the table, against Ross's British. As we'd never really played a game using VLE with significant numbers of cavalry, we took the opportunity to give it ago.

A simple table for simple folks - infantry country in the centre, cavalry on the flanks
The table was set with very little terrain; the river was entirely decorative except in the central area where it was a major obstacle to cavalry or guns (but not to infantry). Both players' objectives were simply to capture each other's village which retaining control of their own!

Both players got to select troops with a flexible list system we use, and interestingly came up with a very similar split of forces - the French had one more regiment of cavalry, the British one more infantry battalion. Both brought along three batteries of artillery; all were light guns although the British were all RHA and so more mobile than the French foot batteries.

So, we kicked off; Paul massed his horsemen (including two beautifully-painted Guard regiments) on the left, while Ross positioned a couple of regiments of light dragoons on the other side to support his infantry. The French won the Initiative and advanced with alactrity.

The French deploy and push forward at great speed
British Infantry brigades mass on their left, with the Heavy Brigade in the distance on their right
The French go defensive on the right, holding back some poor-quality Wurtemburg battalions...
... while pushing their first wave of cavalry across the river on the left, supported by two batteries of guns
British dragoons seize a chance to gut an enemy light cavalry regiment, but pursue in disorder before halting winded and so are, in turn, routed by supporting French.
As the Guard pours across the bridge in the centre...
... the Scots Greys meet their match on the right, and are broken by their Nemesis - French lancers!
The French artillery grab a piece of the action, manning their guns with deadly accuracy
The British right in chaos - a mess of broken and heavily-damaged regiments, as the French reserves arrive
The cavalry action on the British right developed very quickly, and not to their advantage. The French attack in the centre never even had a chance to gain momentum before we decided it was "Game over, man" for the British. The speed with which the cavalry swung this battle astonished us all - the game was over in two hours (these Division-sized, multi-player games normally meander along all day!)

Well, there was only one thing to do - have another game! Both sides resurrected their dead and redeployed; we were ready to roll again before lunch!

After pies, Ross decided to position the British entirely on the centre-left, and pushed strongly forward on this side. Initially, this looked as if it would catch the French napping, as most of Paul's cavalry was again strung out on his left flank.

The British huddle!
Screened by the 60th Rifles...
... the British push forward, hoping to overwhelm the French right
The French start to swing their cavalry across...
... but will they be in time? The Wurtenburgers still look shaky...
Ross  pushed forward, but somehow didn't seem to get a momentum going - it seemed to take ages for his men to reach the enemy lines. Meanwhile, the more dynamic French cavalry (led, of course, by the Imperial Chasseurs á Cheval de la Garde) were pouncing mercilessly on the troops holding the British right (in the centre of the field).

British guns pour canister into the Chasseurs, but they just keep on coming
The gunners take shelter in a square, and the Chasseurs charge on to casually sweep away some British light dragoons who had the temerity to stand in their way
British columns finally assaulted the poor Wurtemburgers, who surprised nobody by dying in droves and routing. Suddenly, a hole had opened, and Obaix looked to be within reach.
The Wurtemburgers evaporate, but some Proper Frenchmen arrive to save the day

However it was not to be. A French battalion promptly attacked from the woods, pouring volley fire into the British column's exposed flank before  plunging in with La Bayonnet.

At the same time, the supporting British cavalry charged the French gun line on the hill - only to be surprised and cut to ribbons by a French reserve cavalry brigade which had been sitting patiently, concealed on the reverse slope.

Cuirassiers - the Hammer of God...
With that the British were becoming encircled and were out of options -another stonking French success. A longer and more interesting game, but again over remarkably quickly, just taking a leisurely afternoon.

Postscript


Both games showed the importance, speed and striking power of cavalry, but also their fragility. VLE treats cavalry as one-shot weapons - casualties in cavalry-cavalry melees tend to be one-sided and heavy on the losers - and this game brought that out fully.

In both games, the British horsemen were destroyed by a combination of occasionally ridiculous luck in Paul's dice-throwing, but also well-judged skill in using his troops to draw the British into poor situations and an uncanny ability to have heavy cavalry or lancers in just the right place to run down and destroy disordered enemy.

The Guard cavalry must be singled out for Mentions in Dispatches - in the first game, the Grenadiers á Cheval just shrugged off a potentially fatal morale roll with a double-6, while in the second game the Guard Chasseurs were simply unstoppable. Both regiments had clearly been armed with Lucky Dice, and wielded them mercilessly!

Paul has also written an account of the day - do go and see his excellent blog.

Saturday, August 8, 2015

Quatre Bras, 1815

This game was an attempt to refight Quatre Bras - without the French realising what it was and being able to apply any benefits of historical hindsight. I planned it all quite carefully, and disguised the battlefield by making up place-names (well, fans of Tin Tin may realise some aren't as made up as they look!) and swapping west and east. All went swimmingly from that perspective - the French (played by Ross and Jim) didn't click to the nature of the thing till quite late in the day. Andrew and Paul commanded the Allies.

Alias Quatre Bras - the map
The table, looking south - the stream was removed before the French players arrived to add yet more Fog of War


However, in a classic example of careless design and umpire hubris, I completely wrecked it by mistiming the whole thing. I kicked off at 1pm - the time around which the French started to seriously engage the Dutch - but started the French player way too far back. I should have either let them deploy much further north, or set the game time to start an hour or two earlier. As a result, by the time the French forces approached the Dutch line, pre-programmed Allied reinforcements were already starting to pour in. I could probably have resurrected the timeline by pausing the game-time, but I didn't realise how badly out things were out of sync till far too much had already arrived in the Allied rear.
Looking north from the French rear - the French forces are shown by markers at this stage to keep the Allies guessing
 Interestingly, our French players made the same call as Ney did historically - Bachelau's troops were sent left (equivalent to the historical right, or east - keep up!) across the more open country, which was also (in a spooky parallel) weakly held by almost the same Dutch-Belgians who had in reality.

Action imminent - Bachelau's men assault the Dutch defences around the farm...
... and evict them in short order.

The Dutch fall back on their main line - which, unhistorically, already exists!
The French push on...
... but so many Allied reinforcements have now arrived unreasonably early that there is no way the French can attack this position with the forces available. Ah, if only D'Erlon was here...
 So, apologies again to the participants for the waste of a good opportunity; an enjoyable enough day was had I think (and the pies, at least, were good!) but relatively little action occurred and the French were on a hiding to nothing from the start.

Paul has put a fuller description of events and a lot more photos on his blog.

Monday, July 6, 2015

Northern Portugal, September 1810

A Bridge Too Far


Another off-the-cuff game saw Picton's division acting as rearguard on the retreat towards Portugal in the autumn of 1810, pausing to deliver a check to the French vanguard on the road to Bussaco. No-one expected more than a delay to Massena's hordes, but a shocking result however threw the whole future of the British in the Peninsula into doubt!

The initial British position, looking North - behind a nice ridge as usual!
The British division, commanded jointly (or perhaps that should be dis-jointly) by Ross and Geoff deployed in the south-west corner of the table, using a ridge line to cover any French approach from the north, while guarding against an attack  across the bridge on their eastern flank. The road to Lisbon leads off to their rear, across the other bridge. The river was otherwise uncrossable, so control of these two bridges was clearly key to their position.

Further to the north-east, the French main line of advance can be seen in the far corner.

The British were uncertain of the exact position of the French advance guard and the wily General Foy, in the person of Andrew, was keen to keep them guessing. Scouts had been sent out to the north and north-west in case a flanking move was intended, but there was never any real doubt that the main enemy advance would come from the north-east. Crucially though, Picton decided not to station major force - or, indeed any force - east of the river, relying on a strong artillery position on the end of the ridge line to cover any approach from that direction. This was perhaps not unreasonable - from somewhere, he had acquired part of the Allied siege train and his troops had dragged two batteries of heavy guns onto the hill. Evidently he wasn't planning on moving anywhere quickly - retreat was far from his mind!

As the French began to pour up the road from the north-east, reports from the Ordenanza gave wildly conflicting assessments of enemy strength, but did confirm a good deal of cavalry - including many of the feared Cuirassiers - were amongst them. Fortunately (or so it seemed), Picton also had with him virtually all of Wellington's cavalry, including a Heavy Brigade.

Realising the British failure to guard the eastern side of the battlefield gave him free reign, Foy's experienced artilleyman's eye told him that Picton might have miscalculated. Those guns were truly to be feared by his troops on the march - but only if they were careless enough to stray within range. Accordingly, he commanded his lead brigades - including his strong cavalry force - to swing wide around the south-east and move rapidly to threaten the British rear. He didn't for a minute expect Picton to ignore such a threat to his line of retreat, but it should at least provide his Chasseurs with some sport...

Foy's cavalry sweep rapidly around the southern edge of the battlefield, threatening the British LoC

Alarmed by the French audacity - and infuriated by their determination to keep out of the range of his carefully-sited cannon - Picton ordered his cavalry south, to defend his route south against the French horsemen, and pushed two battalions of infantry over the bridge to pressure the enemy in the east.

British cavalry ride south, while infantry move east to secure the bridge. So far, so good...

But then something happened - perhaps some sunstroke had caused Picton's brain to boil inside his top hat - and the British commander changed his mind. Seemingly concerned to an excessive degree by reports that the French force included more Cuirassiers than were at that moment in the whole of Spain, and apparently losing any focus on the vulnerability of his route back towards the safety of the main army (or overly confident in his men's ability to triumph over the enemy), he countermanded these movements and ordered his troops to return to their original positions.

The British pull back west and north of the river

Astonished by this, but unable to see any subterfuge, Foy let his cavalry loose. Leaving a strong screening force to prevent the British crossing the bridge again,  they roared off-table to the south to rampage amongst the British supply train and see how far they could get down the road to Lisbon!

Damn me sir, how unsporting - they won't even let us shoot at them!

The lone British RHA battery covering the bridge was able to do nothing more than scare some horses, as more French horsemen took cover in the dead ground behind a wood and awaited developments.

Those pesky Légère are at it again... And where are those guns going?
Those were not long in arriving. The French slowly dragged their two batteries of foot artillery - only 8pdrs, but good enough - up onto the rear slope of the hill, invisible to the British heavy guns. From here, they started to pound the British position west of the bridge - packed with infantry - mercilessly. 

The hard pounding begins

Meanwhile, two battalions of Légère occupied the southern wood and the enclosures beside the bridge.

Finally realising his predicament, Picton ordered the bridge to be stormed - a breakout here might allow him to deploy and finally carry the fight to the French. One after another, three battalions valiantly attempted to charge across but each was met with fierce resistance from the Frenchmen defending the hedges and driven back with considerable loss.

Slowly the full horror was dawning - although Picton's men occupied a strong defensive position, it was now on the wrong side of a river and they were under siege. As more French reinforcements moved up, it was clear that any further attempt to break out across either bridge would be even more doomed to failure than the previous efforts.

Will Wellington be able (and willing) to move up and rescue his beleaguered force, or can Massena block him with superior force? Would a few days without food and supplies then force the unimaginable - the surrender of an entire British division?

As a final insult, it was revealed that the Cuirassiers who had managed to instill such fear and paralysis into the British commanders had been misidentified and were merely dragoons with especially highly-polished helmets.

Truly, a Bridge (or two) Too Far...

Monday, May 11, 2015

Even the British have bad days!

This game was a more relaxed affair, as numbers were down and nothing specific had been set up in advance. So, a simple battlefield was thrown together with a row of hills which some cowardly British could hide behind and a couple of small woods; a French division was then sent to evict them!

The French had around a dozen infantry Battalions; all the troops were average XL, with two Veteran light cavalry regiments sneaked in to add some experience. The British division was a little weaker in infantry but had a Veteran Rifle battalion as well as two small units of heavy cavalry and the 10th Hussars. Jim and Geoff commanded the French, while I skulked behind the hills with the British! Andrew took command of the British centre-left when he arrived after lunch.

The French kick off...

... ignoring the farm complex on their left ...
... and pushing carefully forward in more strength on the right.
The French commenced a general if cautious advance, although after an hour or two the appearance of a battery of RHA on the hill on the British left was enough to persuade the timid Frogs to pause - and even pull back a little - and think about their options. Meanwhile, on the other flank a British brigade erupted from the farm and enclosures to threaten the enemy flank, with the Rifles charging up the hill towards the side of the French gun line.
Surprise!
The French had little choice but to withdraw their guns as they pulled a Légère battalion back to counter the Rifles. Seeing the guns limber up and move off, British cavalry also began to move forward on their right to add to the pressure. Things were looking rather tight for the French on the left!

And then it all started to go wrong... The Rifles fixed swords and charged confidently into the Légère; to their horror and lasting embarrassment though the French battalion proved more than a match, inflicting many casualties and swiftly breaking them them for little loss!

It was never like this in Sharpe...

Smarting for revenge, another RHA battery appeared, rushing forward to rip a French square apart with canister. A hundred men fell in a few minutes, and the 10th Hussars scented blood! Confident that the square couldn't possibly stand, the hussars spurred their horses to a gallop and charged the enemy infantry.

Cue the Monty Python French insults...
Who promptly rolled a double six for their morale, and made some choice gallic gestures at the British! The hussars were thrown back in disorder - the start of a horrible retreat and pursuit by some vengeful French Chasseurs...

A careless advance by the other French cavalry regiment presented yet another opportunity for the British to inflict some serious punishment - a heavy cavalry regiment promptly charged it, again confident their superiority would leave the field littered with French corpses. Alas, again it was not to be - yet more appalling dice throwing and they too were headed for the rear...

The Thin Red Line begins to bend...
Meanwhile, on the other flank an RHA battery which rashly unlimbered facing to the side was smashed to pieces by a storm of enfilade fire from both French 12pdr batteries.

It wasn't all as one-sided as this of course, and proved a very enjoyable game for all concerned. Interestingly, by the end of the afternoon both sides reckoned the other had won! However over all I'd say it was really a French victory as they were in a position to bring significant force to bear on the British centre, which would have prompted a full withdrawal as we just didn't have the reserves to resist it (or indeed any reserves by that point).

As ever, thanks to the participants for a fun day.